Kitchen Demo Weekend – Day 2
Posted: September 11, 2013 Filed under: our home, our kitchen | Tags: bagster, demo kitchen, diy, diy kitchen demo, Home Layout, kitchen, kitchen remodel, sledgehammer Leave a commentDay 2 of 3 – Actual Kitchen Demo
9am – While tarping up both sides of the hallway, while hanging a temporary light (thanks to my purchase of black tarps.. duh future note get the clear ones..) our first helpers arrived to help with the demo.
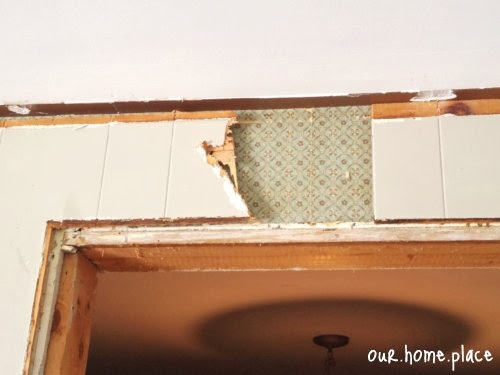
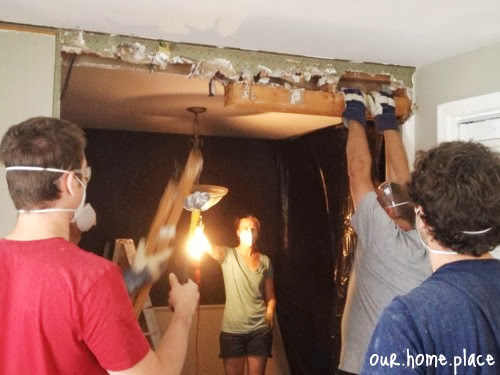
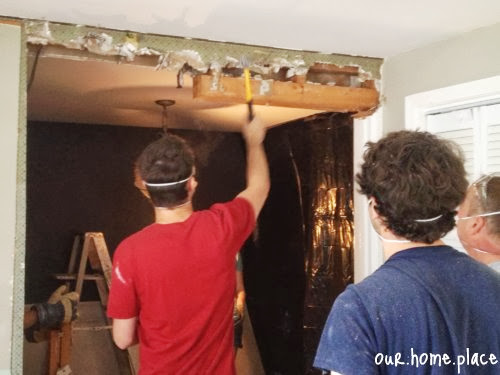
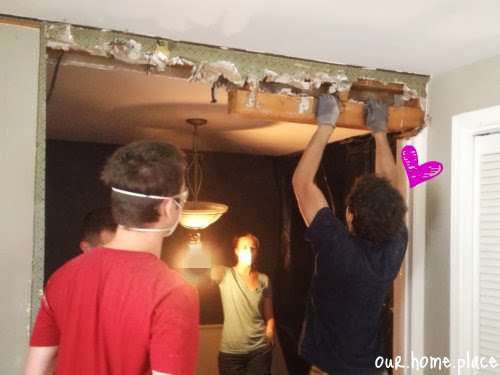
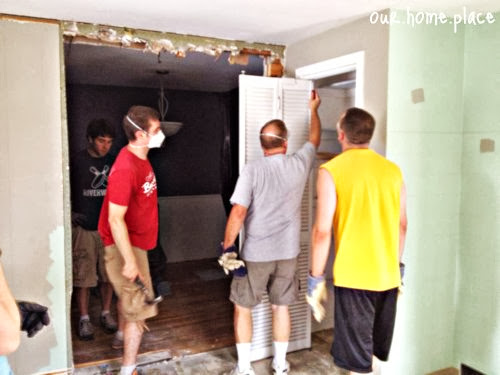
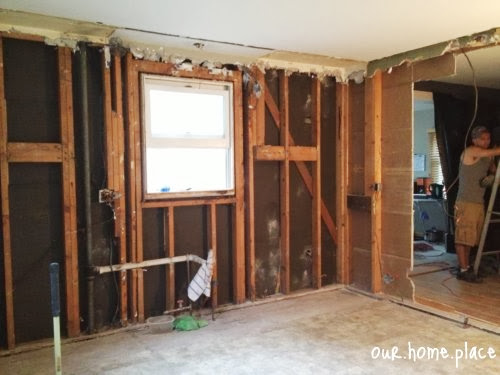
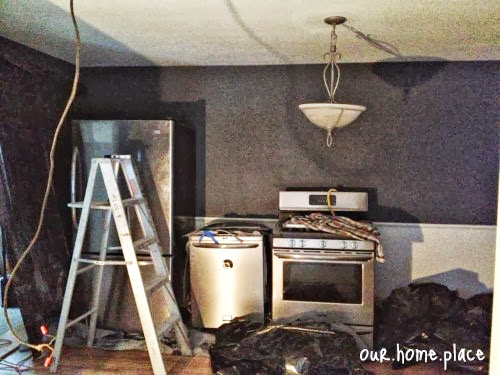
First we needed to get the appliances out… however we could not fit them through the narrow opening of the existing doorway therefore we needed to take down part of the wall first to slide the appliances into the kitchen. The door frame was removed, and exposed some (what I think is) Awesome Wall Paper, two layers underneath the paneling, and I was pretty upset I didn’t get to see the wallpaper for the last year and a half as I think it was prettier then the paneling.
(Note: We didn’t remove the whole wall at first, under the guideline of you can always take out more, but it would be harder to add wall and paneling back.
It took a lot of effort.. and as more helpers arrived everyone got there turn to swing a hammer..
However I may be a little partial…
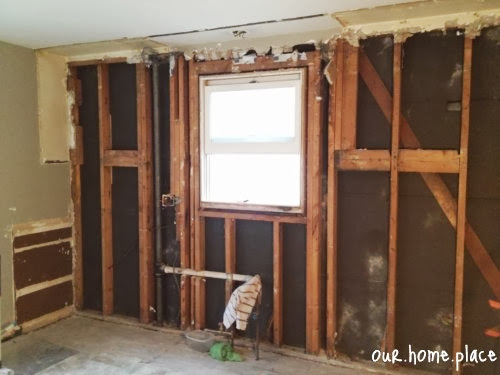
After part of the wall was out, appliances were removed which made the space feel HUGE!
Especially from this angle.. this is where I did a little happy dance..
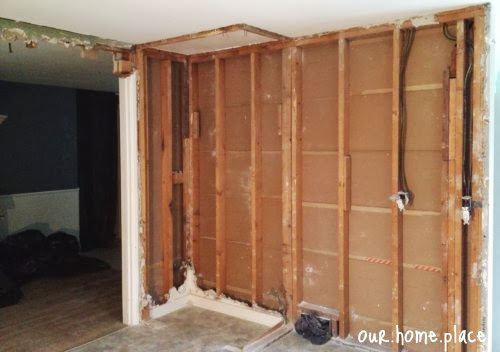
Next up was getting rid of the pantry:
And the built in original cabinets and countertop:
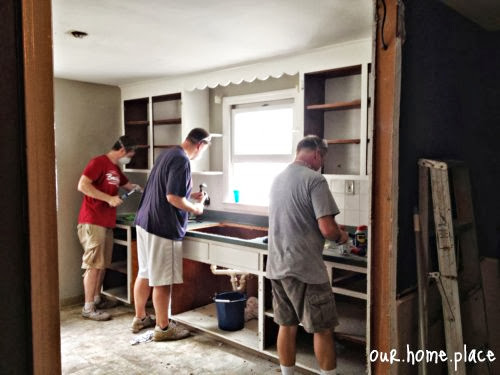
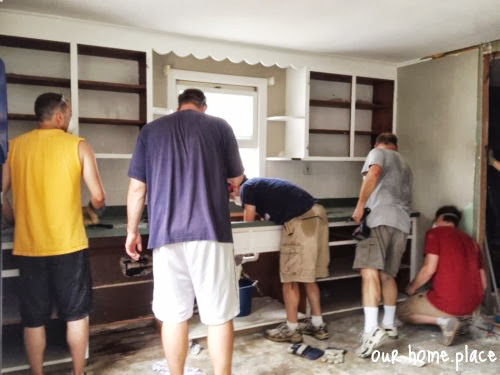
How many helpers were needed you ask… seven 1/2 including me.. but obviously me on my camera with bronchitis I wasn’t the greatest extra set of hands..
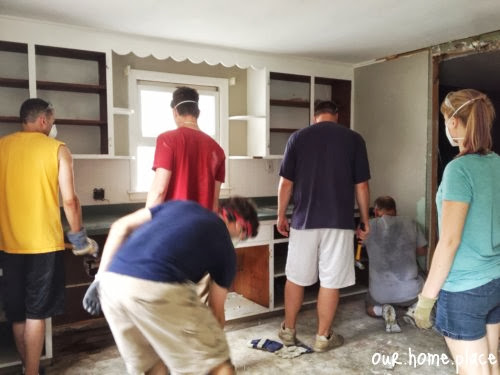
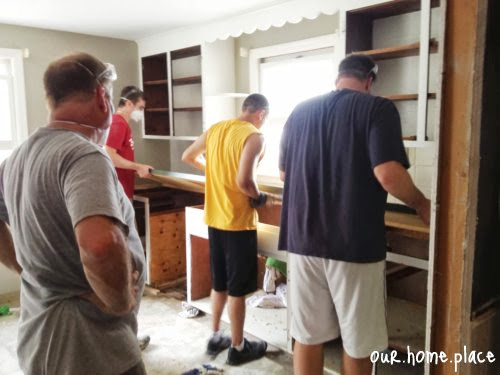
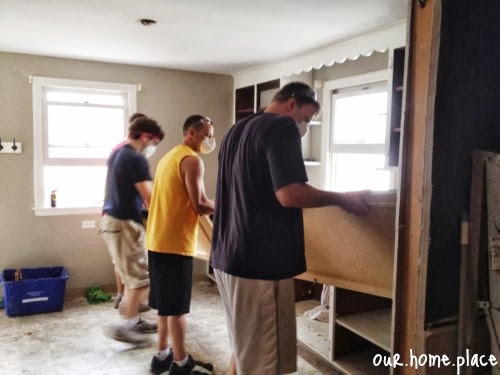
With the countertop out, Greg was hoping to save the cabinets for the garage or basement work space.. however the cabinets were custom built in the kitchen they weren’t going to come apart in boxes.. so off to the Bagster they went..
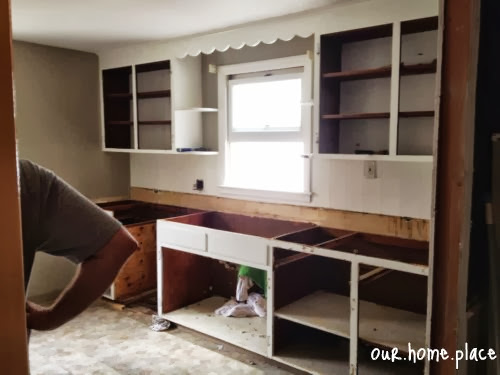
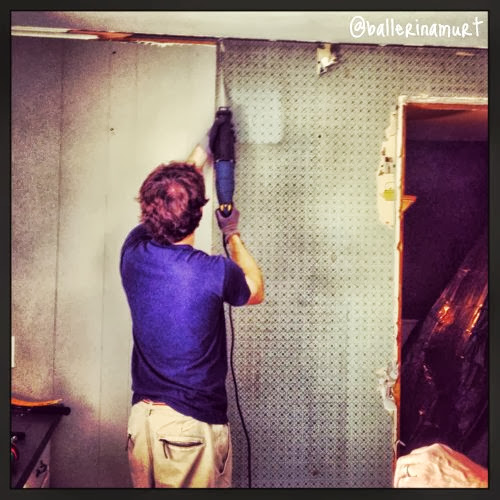
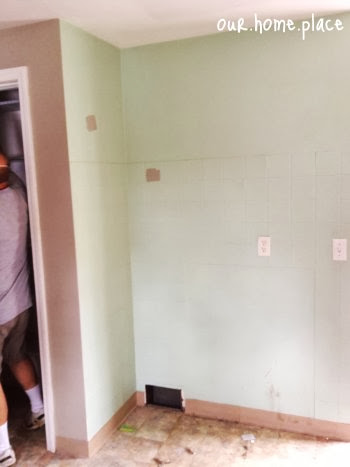
In his picture is where Greg and Fran learn that the painted over square tiles are actually adhered metal tiles glued individual and painted over at least a couple of times. Each square on this wall and behind the fridge
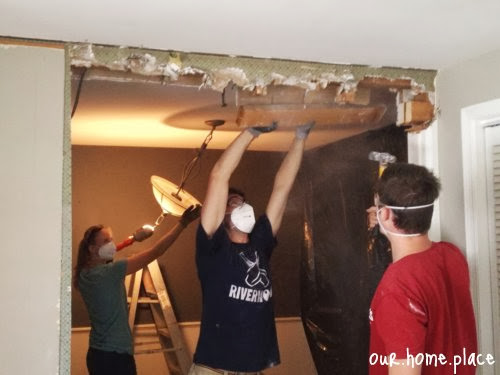
After a break for lunch , the concrete came down with a 12-lb sledge hammer borrowed from the neighbor.. However as this was occurring we realized that the Bagster was getting almost too full.. so I opted for a quick Home Depot run to pick up a second bag.
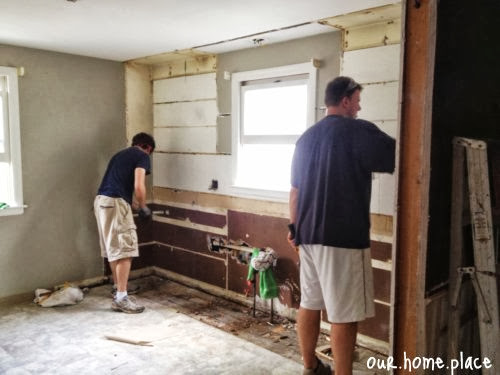
By the time I got back, I helped finish removing the opening wall, while Greg angle ground off the wire mesh from the top corner perimeter (note: that stuff is evil according to him)
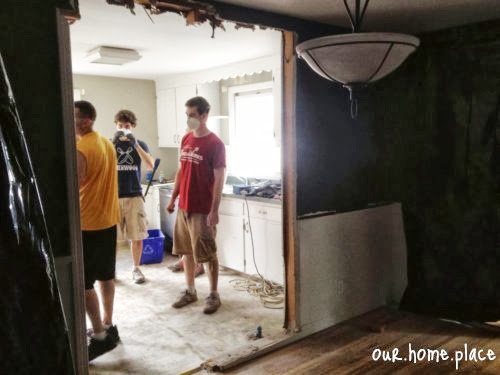
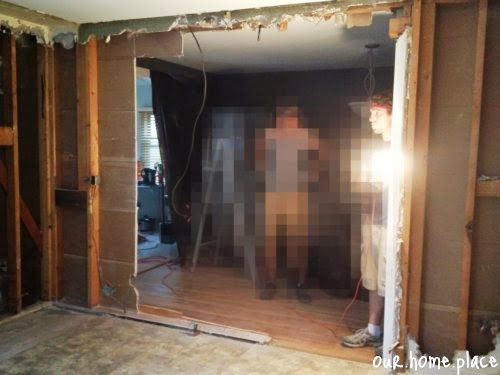
By 4pm: our house looked like this:
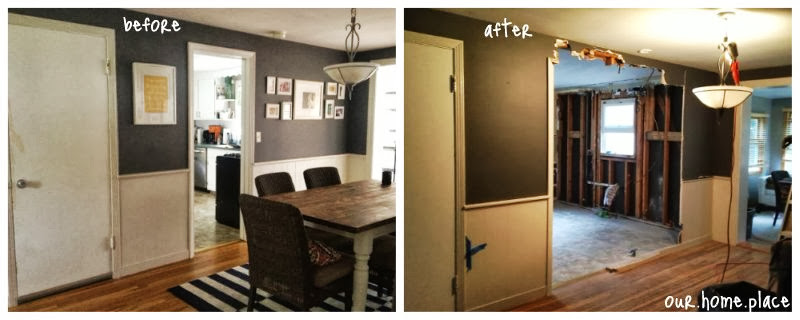
With a little sweeping here is what the kitchen looked like on Saturday before Demo and Sunday after Demo.
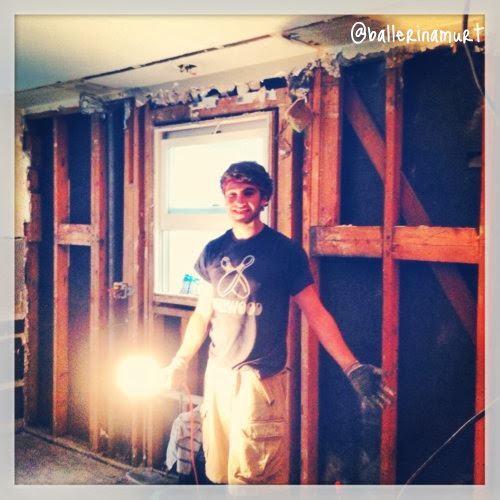
Closing with Greg was pretty proud of himself and wanted a picture in the new kitchen to remember the big day from.
Bagster 2 – $30
Pizza & Beer for Family and Friends – $65
Kitchen Demo Weekend Day 1
Posted: September 10, 2013 Filed under: our home, our kitchen | Tags: diy, kitchen during a demo, kitchen during a remodel, kitchen organization, make-shift kitchen, remodel, temp kitchen, temporary kitchen Leave a commentThe day finally came, it was DEMO Day!!!
Okay well almost, lets back up a little.. we broke demo weekend into 3 parts (since it was a long weekend and we had plenty of time).
Day 1 – Saturday- Organization
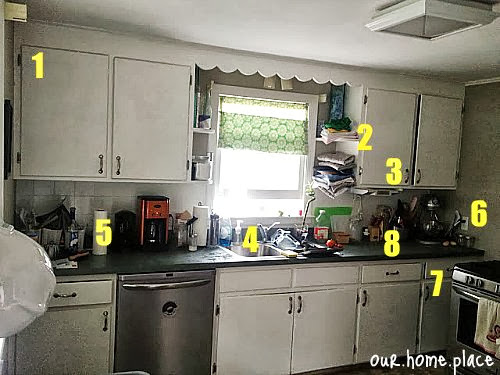
This entailed getting everything out of the kitchen in addition to setting up our temporary kitchen for the next 3 + months. Deciding on what was absolutely necessary the below is what we came up with. (As we’ve now been living like this for a week and a half, I’d say we did a pretty good job remembering the essentials… however I”m sure I forgot something)
Our main appliances are limited down to:
- Fridge
- Toaster Oven
- Hot Plate
- Coffee Maker
- Hot Water Kettle
- Hot Air Popcorn (Greg’s impulse grab)
- Blender (small ninja blender attachment)

Shelving 1
Top Shelf: OvenMitt, Kitchen Towels, Plastic Wrap, Aluminum Foil, Plastic Bags, Toaster Oven Accessories
Breakfast Essentials: Cereal, Rasins, Oatmeal, Dried Fruit, Coffee, Sugar, Coffee Filters
Middle Shelf: Gluten Free Cookbooks (Crockpot meals!), Coffee Mugs to take to Work, Disposable Everything: plates, silverware, bowls, napkins, coffee mugs. Spice Basket.
Pots: Includes 1 small pot, 1 stirfry everything pan, kitchen appliances and 1 Mixing/Popcorn Bowl, 1 Colander, 1 2 Cup Measuring Cup, Cheese Grater, Wine Opener, Beer Opener, Pizza Cutter, and Tbsp & Tsp Measurements,
Baking Items; These are all of my flours however since they were opened I didn’t want to put them in the basement.
WINE: We already have 2 wine fridges (1 white, 1 for red).
Mini- Kitchen: Appliances, cutting board, knives, and mini mug of 5 essential cooking utensils.
Shelving 2 – Food and misc items
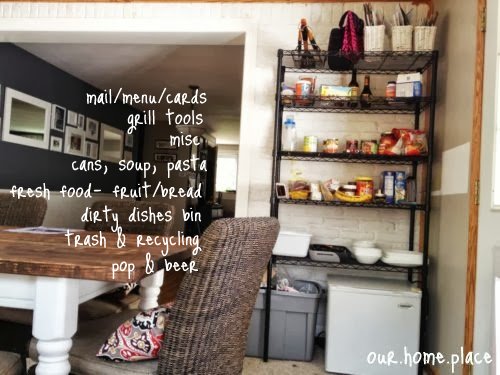
We also kept our kitchen dishes however honestly we haven’t used them for the shear convenience of disposable. However we still have a dirty dishes bin (to carry downstairs to the utility sink). In addition to the trash and recycling bins are in the gray bin on the bottom shelf, we just put a lid on it so Guinness can’t get at everything… its been mildly successful..
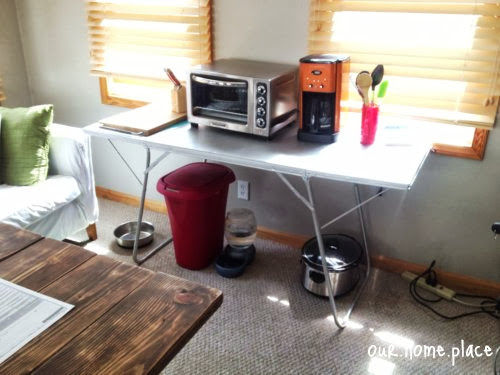
In addition this metal folding table serves as our counter top and the hub for our mini kitchen. Since its metal we’re figuring it can handle the heat from our appliances over a traditional plastic table.
So now that the mini-kitchen was set-up we were all ready for DAY 2. DEMO DAY!
Total Spent – Day 1: ~$1200 (includes $1000 from cabinets -here)
Shelving – $120
Bagster – $30
Dust Masks – $10 (already had from Habitat Re-Store)
Garbage Bags – $10
Plastic Bins (to store all other kitchen items) – $30 (6 @$5/pc)
Deciding on a dime
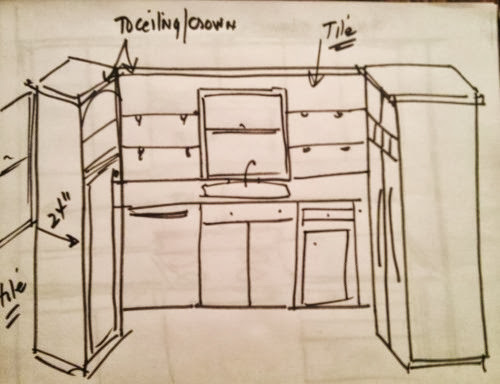
Posted: September 9, 2013 Filed under: our craigslist finds, our home, our kitchen | Tags: 1950's cape cod, cabinets, diy, diy kitchen remodel, Home Layout, how to, how to design a kitchen layout, kitchen, kitchen demo, kitchen remodel, space saving, woodmode Leave a commentAfter purchasing these beautiful woodmode cabinets over a year ago (see here), we couldn’t wait to get a layout doing. However after a year and half it became crunch time… so its a good thing we finally made a decision.
After getting the cabinets Greg and I mathematically placed the cabinets on every inch of wall space, great for practicality right? Well it did mean that our appliances were all lumped together in order fridge, sink, stove and nothing really appeared functional or aesthetic.
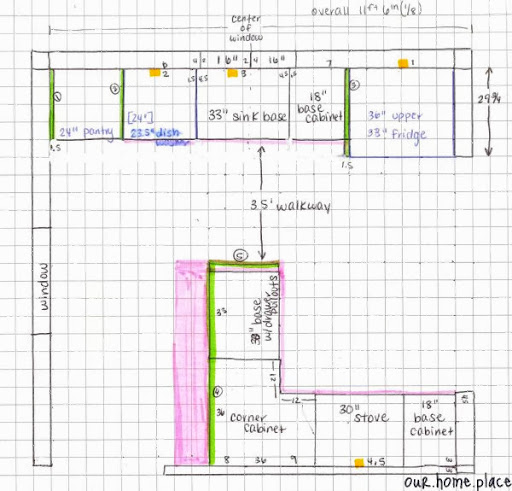
Therefore we asked a designer friend of ours to sketch up plans for us. However with some mis-measuring and we taped the layout on the floor and after a few weeks of going back and forth we decided this layout still felt closed off. (Which was opposite from our 892374932 reasons to gut the kitchen).
Notice the doorway on the right only gets opened by 6 inches.. which isn’t the open feeling we were hoping for. And after walking in the “newly taped” space we realized it was going to feel more enclosed and smaller by the sink then we had originally intended. With 2 people in the kitchen the lack of countertops already.. space would still be hard to come by in addition to the addition of a second empty wasted space corner cabinet (left corner). (Because we only have 1 lazy Susan corner cabinet)
We loved the open shelving, and the fact that we actually could have a functional pantry.
However the plan also required multiple fillers, skins and edge panels (something we had expected going into this) but in addition to having to purchase 2 additional cabinets ($1500-$2000/per cabinet) the $$ started adding up pretty quickly for a layout neither of us were jumping for.
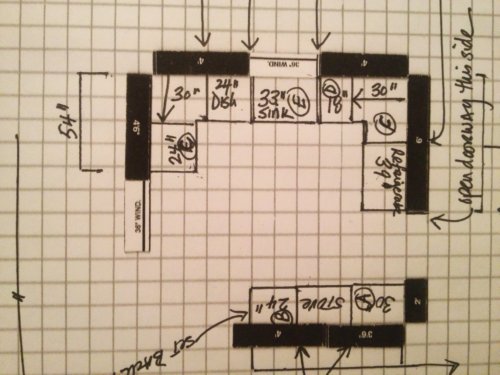
So after a day of thinking on it, I landed on this sketch and we both fell in love. We could take down the wall to the dining room opening up the entertaining space, which so many of our friends and families had also suggested, in addition to adding an island for the helpers in the kitchen.
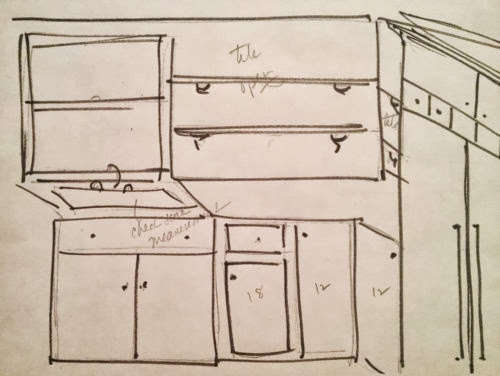
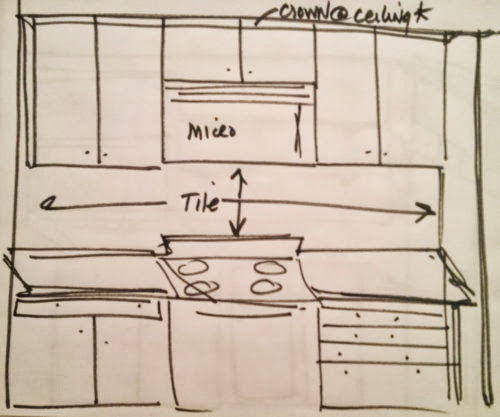
This layout still utilizes the same cabinets from craigslist, a few modifications to the pantry and above fridge cabinet, and the abundance of open shelving we wanted.

Did I mention I also get my pretty stainless steel hood vent fan 🙂 and lots of open upper shelving paired with an extra base cabinet for even more storage!
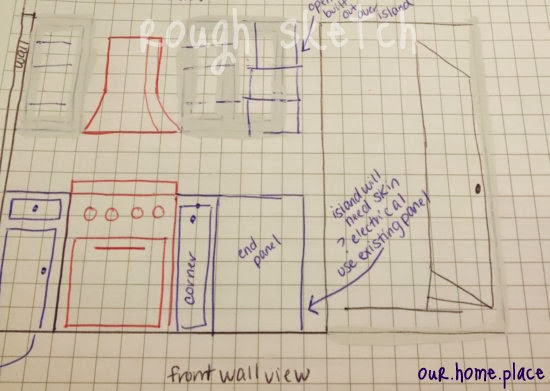
We are using this as our base layout knowing that since both of us are indecisive there is a 99.99999% chance modifications will be made as we start diving into the details, but for now this is just the motivation we needed to MOVE THAT WALL!
Reasons why we hate our kitchen #9497392874
Posted: September 4, 2013 Filed under: our home, our kitchen | Tags: 1950's cape cod, awful kitchen, horrible kitchen, Ikea, inspiration, kitchen, Kitchen DIY, kitchen layout, kitchen remodel, sketch plans 1 CommentBefore we decided to completely gut the kitchen and start over we decided to chronologue why the kitchen didn’t work for us (and most likely anyone). Here are the before pictures of the kitchen area and adjoining walls when we purchased the home:
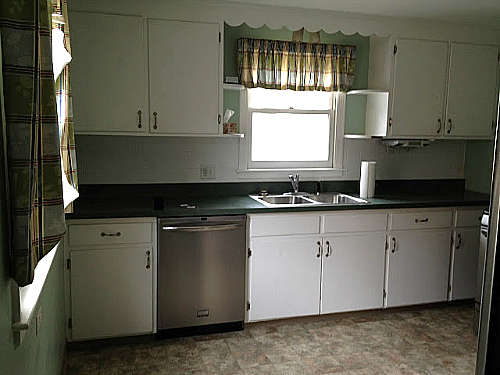


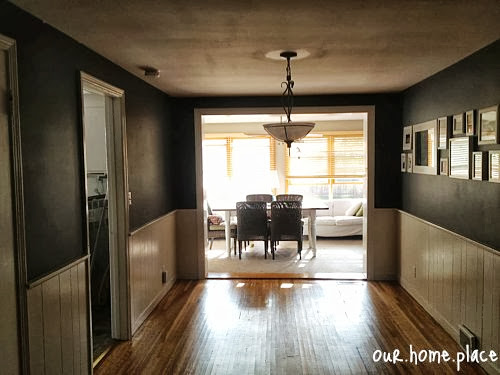
Besides the dark hole in the center of the house, the first thing we noticed was that there was all of this light coming from the kitchen that was being blocked by that wall.
Here are the pictures of the kitchen as we lived for the last year and a half…sprinkled with our laundry list of complaints:
- We NEVER USED the items on the top shelf.
- Un-functional Storage – No accessible storage for towels, oven mitts, and napkins.. (hence junk piled onto open shelves next to sink)
- Under Cabinet Radio – Cool idea, however this beauty and its plug took up the entire outlet rendering any capability of having a plug in there useless.
- Double Sink – Each basin was too small for trying to clean pot, pans or cutting boards. We realized we prefer a single basin, and while we’re at it we’ll add a garbage disposal.
- No Microwave – While Greg is anti-microwave to begin with, this wasn’t as issue, however we then rely heavily always used electric water kettle, so while we’re at it we’ll add a mini hot water tap.
- Nonfunctional Storage – the stove blocked access to a full bottom cabinet, including upper cabinet, counter top, bottom cabinet and pull out drawer on the right hand side.
- Cabinets – Being original the shelves are discintigrating daily leaving a nice layer of dust and particles over my clean pots & pans. {BOO}
- Lack of Counter top – Once we stored all of the items that were unable to be stored elsewhere, we were left with little to no usable counter space.

- AGAIN the nonfunctional cabinets – here is where you can actually see the <12 inches of space between the stove, cabinet upper, lower and counter top.. talk about crashes in the kitchen..
- No hood for stove {not cool for a gas stove} Even a charcoal filter is better than nothing.
- Poor to non existent ceiling lighting.
- No light switch accessible at the doorway near the dining room for when you’re leaving the kitchen.. (think walking to bed in the dark..)
- Pantry has lots of wasted space. There is nonfunctional space between the shelves and the door, and the sqft of space the is unused between pantry opening and shelves.
- More Wasted Space – We turned this into Guinness little area, however the heating vent was here, and is just more waste of space usually.

- Lighting
- Clausterphobic doorway opening
- The Fridge- huge barrier sticking out when walking into the kitchen from the side door. {BAM Hello fridge..}
While I could probably go on.. and on.. and on to end on a good note here are some examples of kitchen styling and function we love (or that I dream about)


Craigslist Kitchen Cabinets
Posted: September 16, 2012 Filed under: our craigslist finds, our home, our kitchen | Tags: cabinets, diy, diy kitchen, kitchen, kitchen on the cheap, kitchen remodel, our craigslist finds, woodmode 6 CommentsSo if you’re like me, when purchasing a home there is always one thing you wanted to immediately to change. (This probably came from watching too much HGTV… at least Greg likes to think so) However for us it was the kitchen. Kitchen’s are a big project, but as overly ambitious first time home buyers we were excited and ready. And lucky for us the original 1950’s kitchen had already been updated with new kitchenaid gallery stainless steel appliances <;2 years ago [thank you previous home owners]. Although now after living in it, it just screams the need for more functionality, casual entertaining space, and a complete remodel!


While we’re always interested in saving money by DIY, we still really wanted to add value to our home that we could take to the bank in the future. Has anyone seen the cheap, poorly done DIY/Flipped homes? You know the ones that immediately scream I did this myself to save money or I watched a lot of Flipped and think that makes me a pro with the jagged cuts and unfinished rooms. Or maybe you’re like us and have watched a ton of the HGTV shows that have a $50,000 remodel and sell their house for $100,000 more. What a Deal, Right? However I hate to break it to you but those shows are filmed in Toronto, Canada eh?and depending on where you are in the US this recouped cost typically never matches those figures.

