Vegetable Garden – Part 3
Posted: August 30, 2013 Filed under: our garden, our home Leave a commentSo after the SPLAT we were left with this.. <<sad face>>
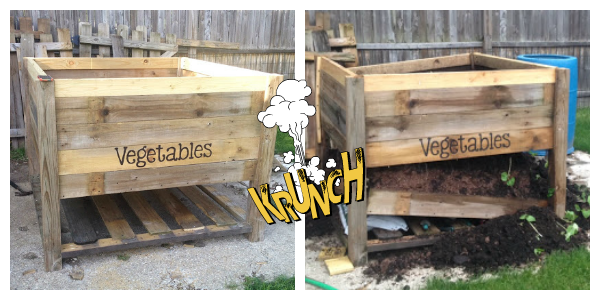
As we were leaving for a week vacation 3 days later and I already had plants in the large box fighting for their life.., we scrambled and ended up with this beautiful box.

I should mention I have the world’s best husband… I don’t think I give him enough credit.. but he’s pretty awesome.

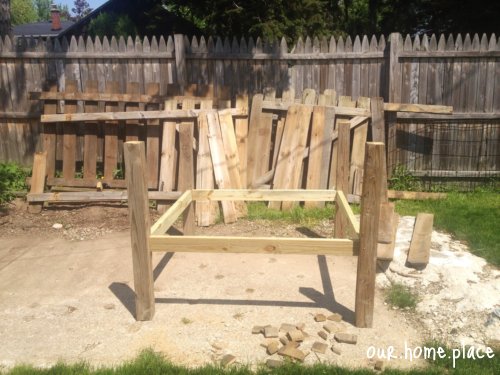
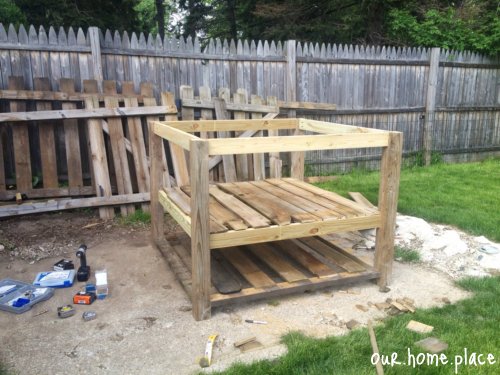
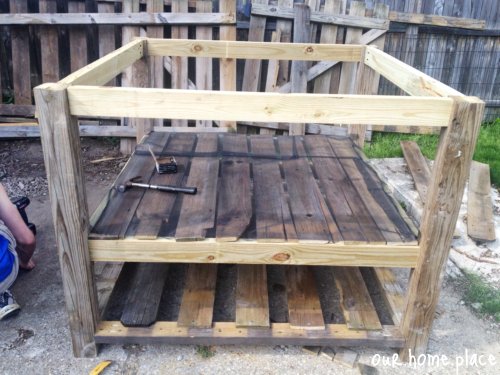
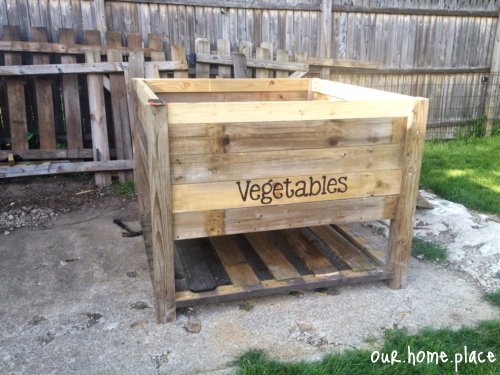
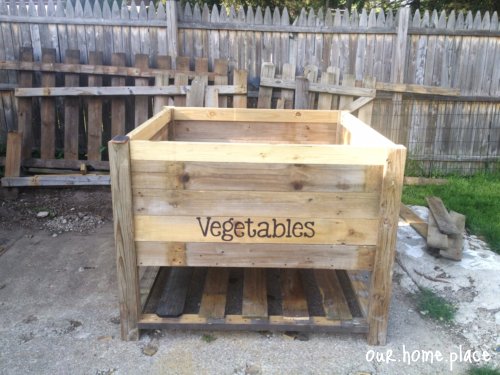
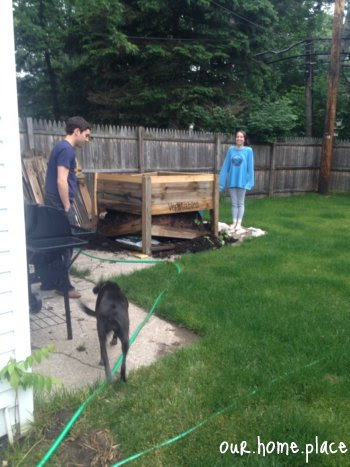
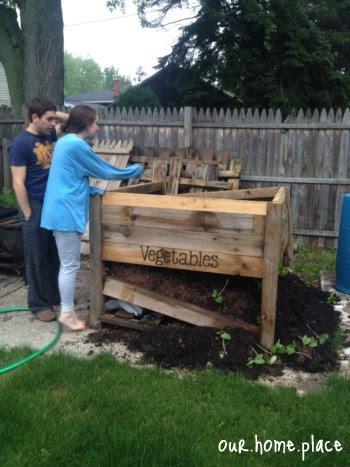
So while I was dealing with the peeling paint closet fiasco… <see here> we rescued and rebuilt a smaller version using deck braces.. they were pricier then I had hoped for (total at $25) but this baby isn’t going anywhere!

This is how excited I was to see the finished product!

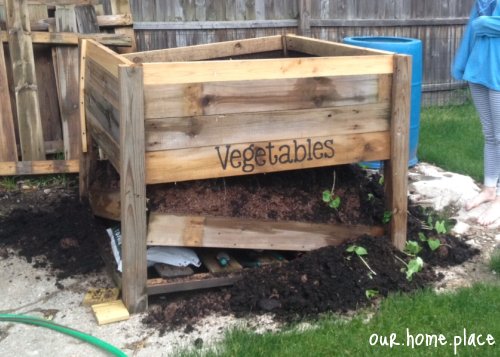
A few weeks later we started seeing our first fruits:

While the fruits were initially small now a few months later the tomatoes have really taken shape and I’m ending up with an abundance, and some lessons learned.. – ugh dryrot..

As of today, we have:
a handful of large tomatoes (a variety),
cherry tomatoes reaching ripeness on a daily basis which is more of candy then being used in cooking..
2-3 zucchini’s and after the zucchini and squash were done and died, I re transplanted the hot pepper plants which were growing in 1″ of toppled over soil… {picture to come}
2-3 banana peppers which seem to grow in pretty much anything including in 1″ of topsoil on top of concrete.
Overall we had a nice dinner with our one non-rotted tomato and squash, looking forward to all the remaining tomatoes ripening for maybe a nice tomato sauce.
How TO and NOT TO build a vegetable garden
Posted: August 28, 2013 Filed under: my crafts, our adventures, our garden, our home | Tags: DIY Fail, DIY Raised Garden, DIY Raised Garden Box, DIY Raised Vegetable Garden, DIY Vegetable Garden, genius idea, Pinterest Fail, Vegetable Garden Leave a commentSo this is where we’re gonna play another game of – What Not to Do-
Greg and I decided we have this large concrete pad, lets build a 4′ x 4’x by 3.5′ tall Vegetable Garden. It will cover the concrete remnants and be subjected to lots of sunlight. – Sweet – {Spoiler Alert.. it wasn’t}
Since I’ve already spoiled the ending below is a photo collage of the construction:
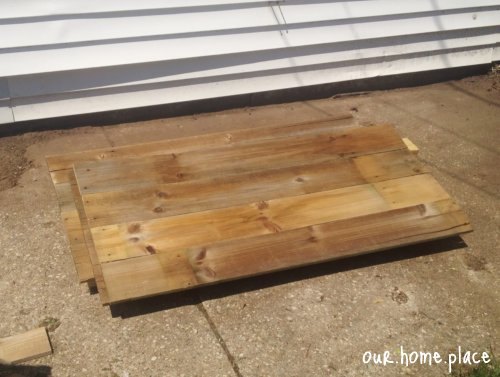
Fence boards kreg jig-ed together for the sides:
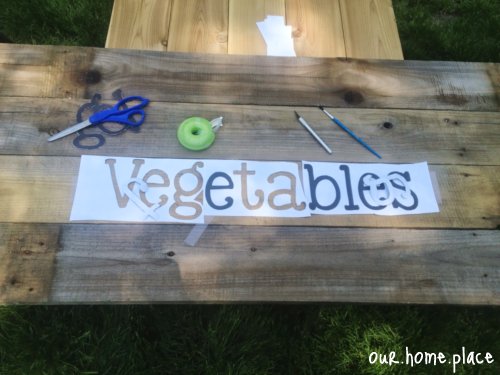
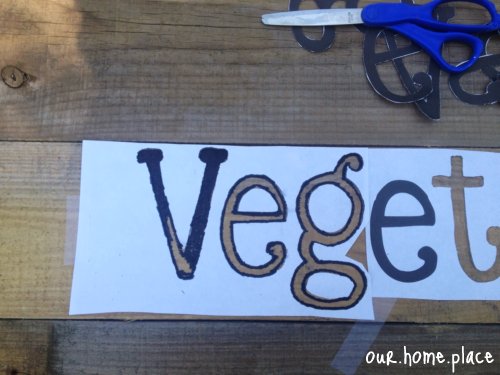
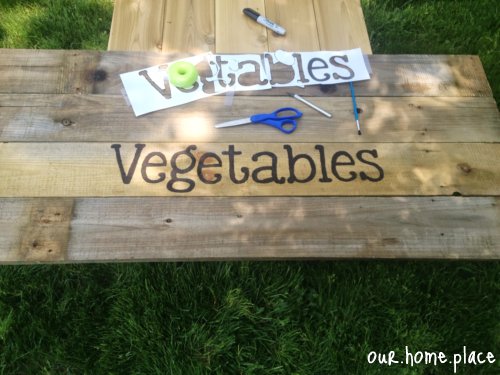
While Greg did all that I stenciled the sides with an awesome logo by using a razor knife, a permanent marker, and some tape.

As I stenciled the logo, Greg was hard at work constructing our 4′ x 4′ monster vegetable garden.
While we can lets enjoy the few other beauty shots I have of this large vegetable box that is no more..
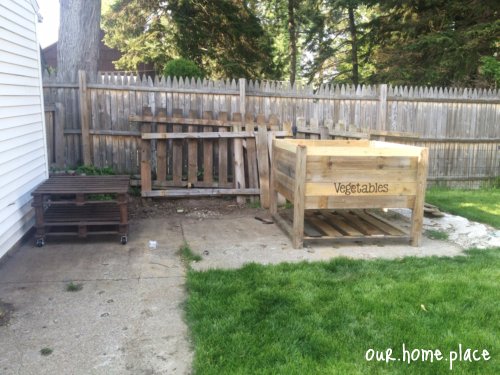
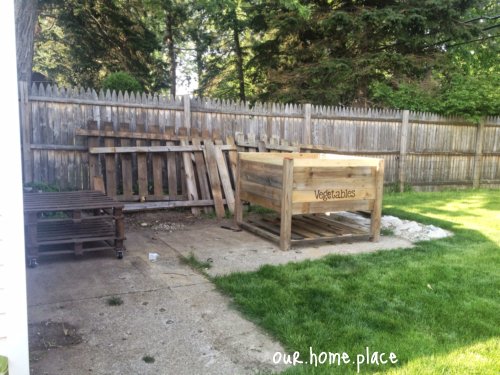
So beautiful.. over memorial day weekend we loaded 279045903 lbs of Top Soil, Vegetable Soil and soon afterwards I over packed it with lots of vegetable seeds and seelings including: Tomatoes, Green Bell Peppers, Hot Peppers, Banana Peppers, Zucchini, Squash and Green Beans..
And then after 2 weeks of straight rain in the begining of June there was a splat.. Which my brother found so funny he caught pictures of me as I threw my temper tantrum.. mixed with complete laughter at our silly FAIL.
And here we are again.. Greg scratching his head as we discuss all the FAIL reasons in our GENIUS idea.
If you follow me on instagram.. you may have also seen what else Greg and I also scrambled to get done before we left on vacation for a week. On top of my peeling closet seen here.. <<talk about worlds best husband nominee>>

Little Mean Green Eating Machines
Posted: August 27, 2013 Filed under: our dog, our garden, our home | Tags: diy, DIY Fail, DIY Vegetable Garden, Fence Boards, Fence Pickett, Pinterest Fail, Raised Garden Box, Vegetable Garden Leave a commentAround our house we have what I like to call our little mean green eating machines which would include: our viscous life eating puppy, the innocent adorable neighborhood bunnies, and we can’t forget Greg & I’s complete lack of green thumbs. Growing a garden in the ground in our back yard seemed to be an impossible feat.
Therefore to combat the first two issues we settled on ideas similar to these:
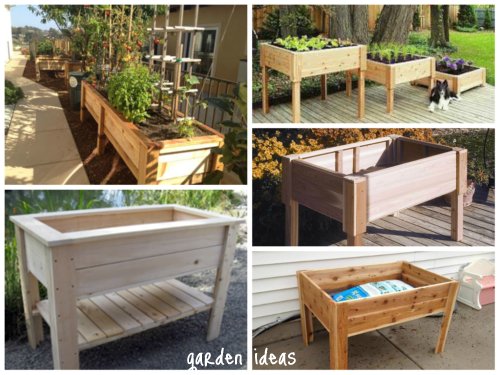
Even Ana-White had a DIY plan to build one, but instead of $80 for lumber or $90-$250 to purchase a garden box we decided to shake what our momma gave us.. <<insert awesome dance moves here>>

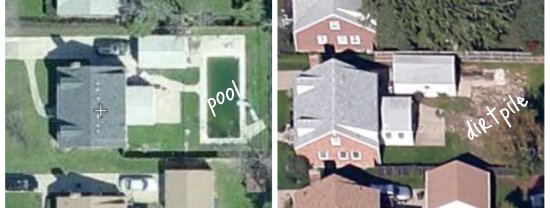
As our home used to have an in-ground pool.. then turned dirt pile when we purchased it.. now turned normal grass back yard. [Read more of that saga here].. we luckily inherited the remains of what was the old in ground pool fencing.
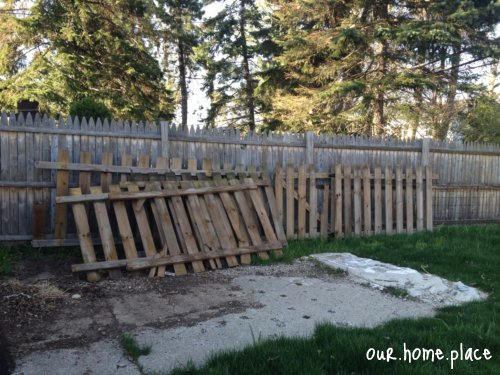
One beautiful Tuesday spring afternoon, I was searching for a proactive outlet for one of those frustrating days at the office. [one of those days where you wanted to rip yours or someones hair out…] <<Insert hammer into hand>>
Greg came home and asked no questions as he observed me ripping fence picket boards off their 2×4 frames and tossing them all around the yard. It was actually super easy, quite painless and only required a few minutes of my time, and after a long day at the office and a beautiful spring afternoon, it was just the outlet I needed.
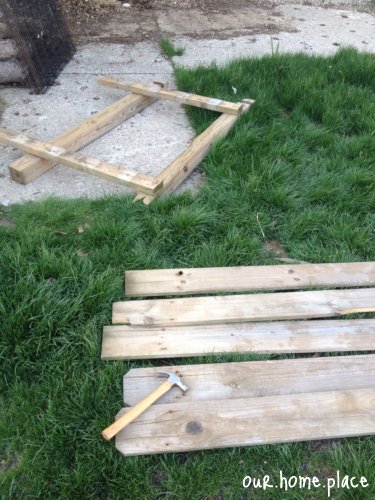
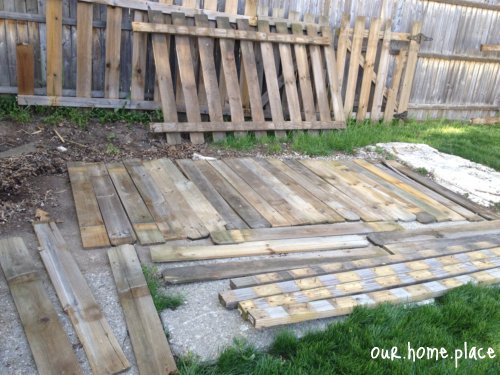

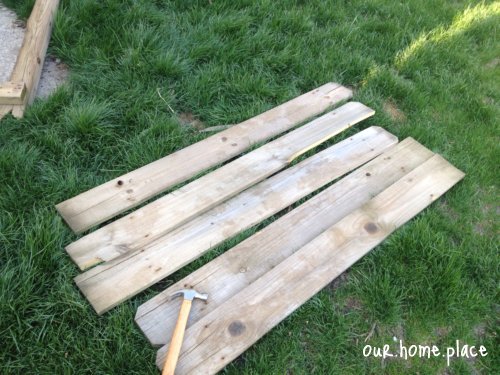
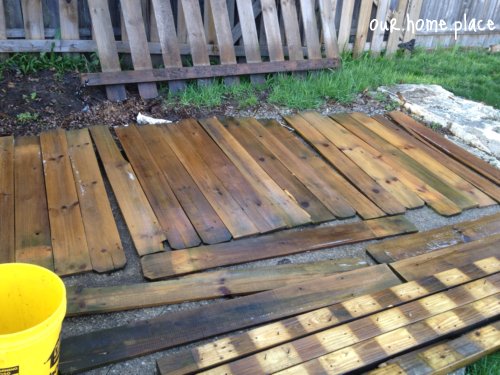
After a sufficient number of boards were laid out I cleaned up the fence boards by scrubbing them all down with the Behr All-In-One Wood cleaner.

After a nice scrub on both sides with a deck brush and some elbow grease the boards were ready to go.
All ready for the weekend, where i’l need an extra set of hands to get our idea on paper..

